Mitigating CVE-2021-44228 in Minecraft
If you are using Minecraft 1.18 or older we recommend following this guide to install a patch to mitigate against any Remote Code Execution (RCE) vulnerabilities due to CVE-2021-44228 in log4j.
If you would like to read more about the patch you can read our blog at https://www.creeperhost.net/blog/mitigating-cve/
If you are using the FTBApp or hosting a server through CreeperHost you do not need to follow this guide as the issue has already been patched.
How to install the patch on CurseForge
First go to https://github.com/CreeperHost/Log4jPatcher/releases/latest and download the Log4jPatcher.jar.
Once its downloaded open up the root of your Minecraft installation (this can be the .minecraft folder or an instance folder of the launcher you are using).
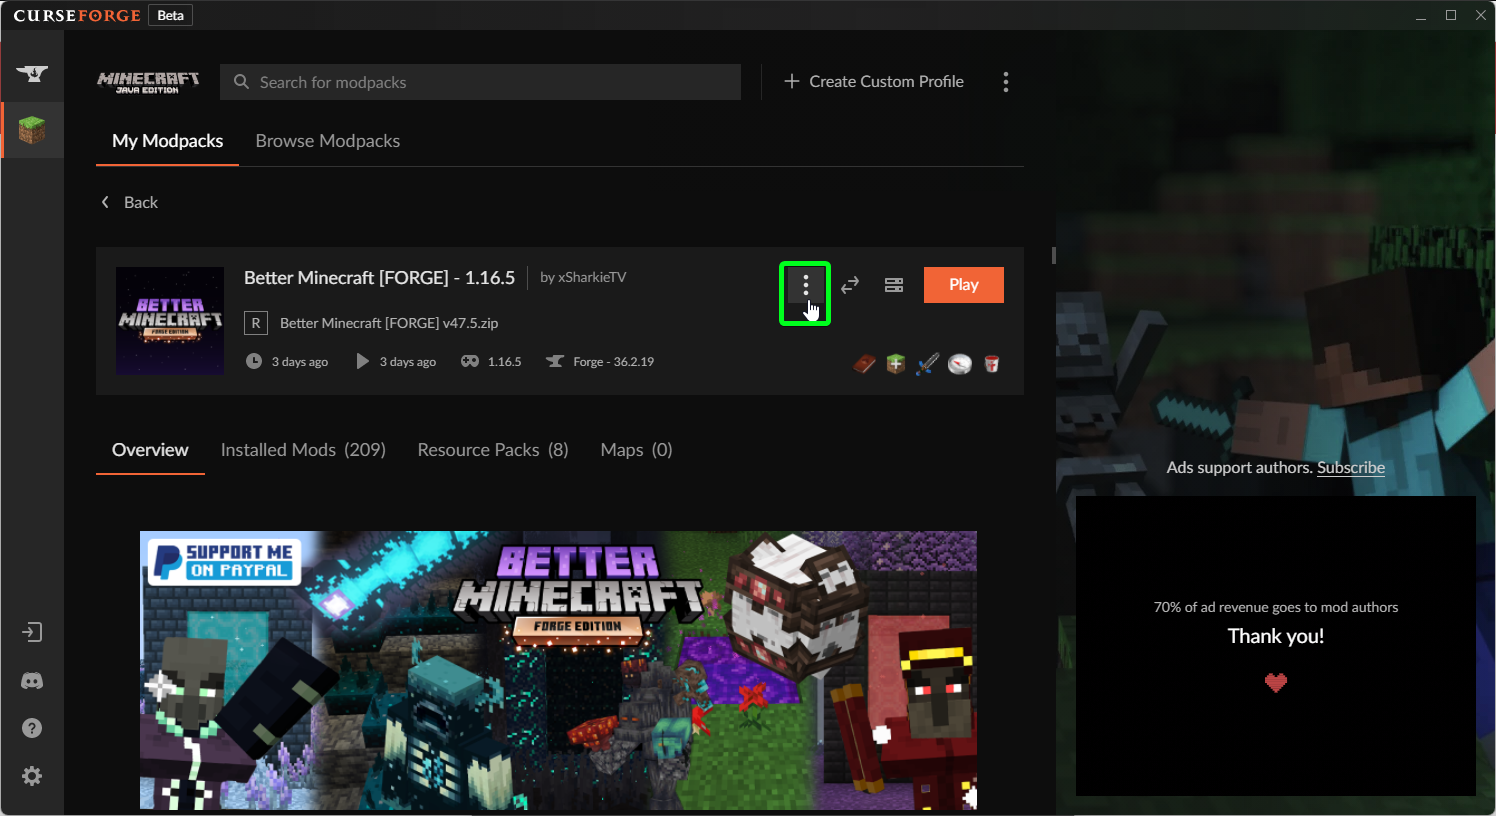
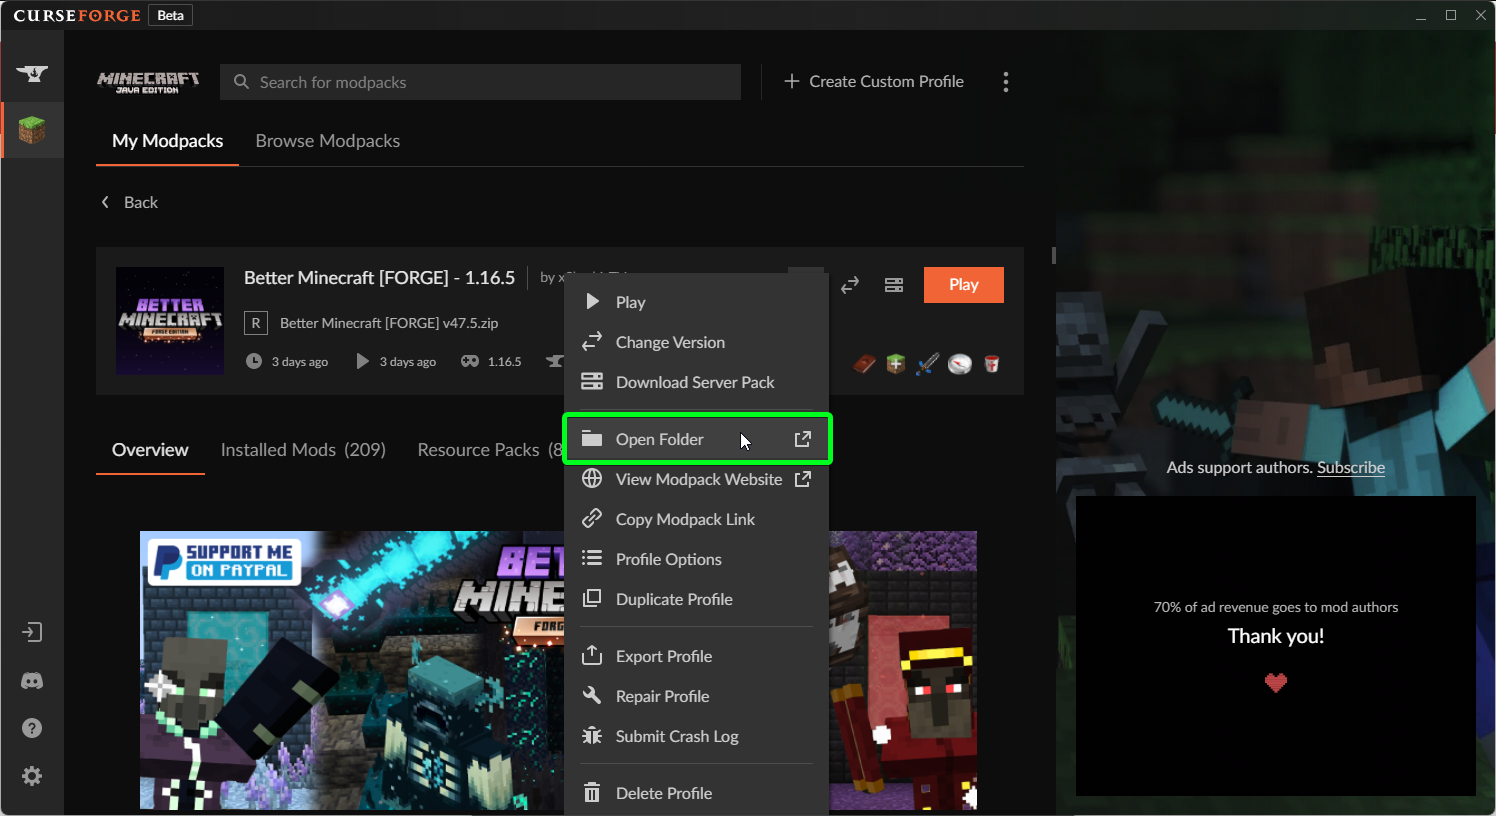
To open the instance folder on CurseForge click on the image of the instance then click on the 3 vertical dots and select Open Folder
It will now open a new Explorer/Finder window where you want to move/copy the Log4jPatcher.jar file to (Do NOT put this file in the mods folder). If the file is name a little differently I would recommend renaimg the file to Log4jPatcher.jar as it will make it easier to follow the rest of the guide.
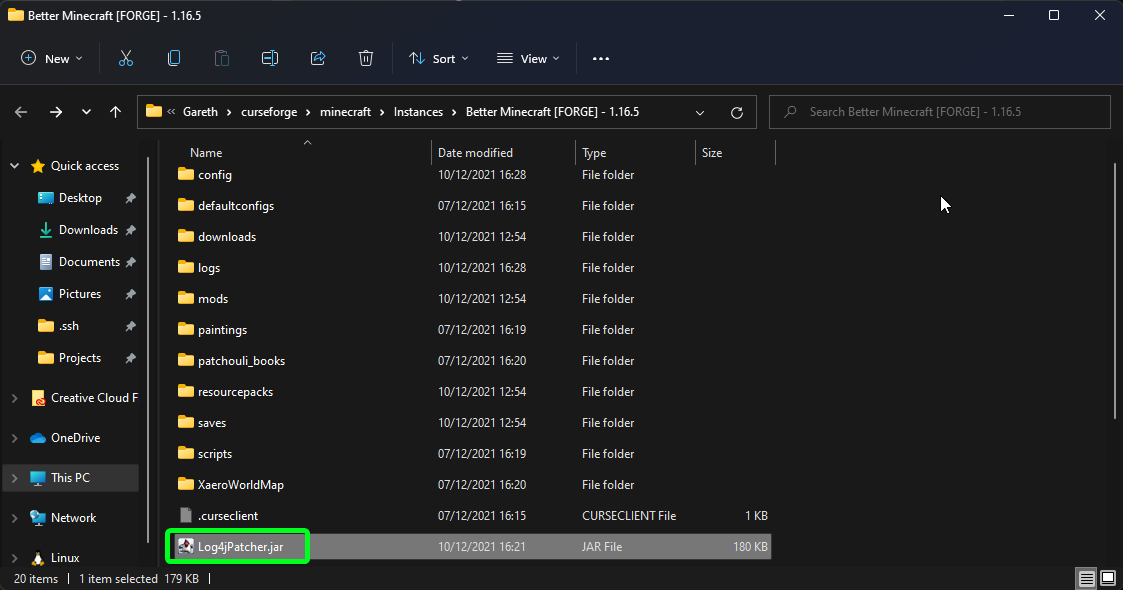
After moving the file to the folder it should look similar to the image below
You can now close the Explorer/Finder window and go back to the CurseForge app.
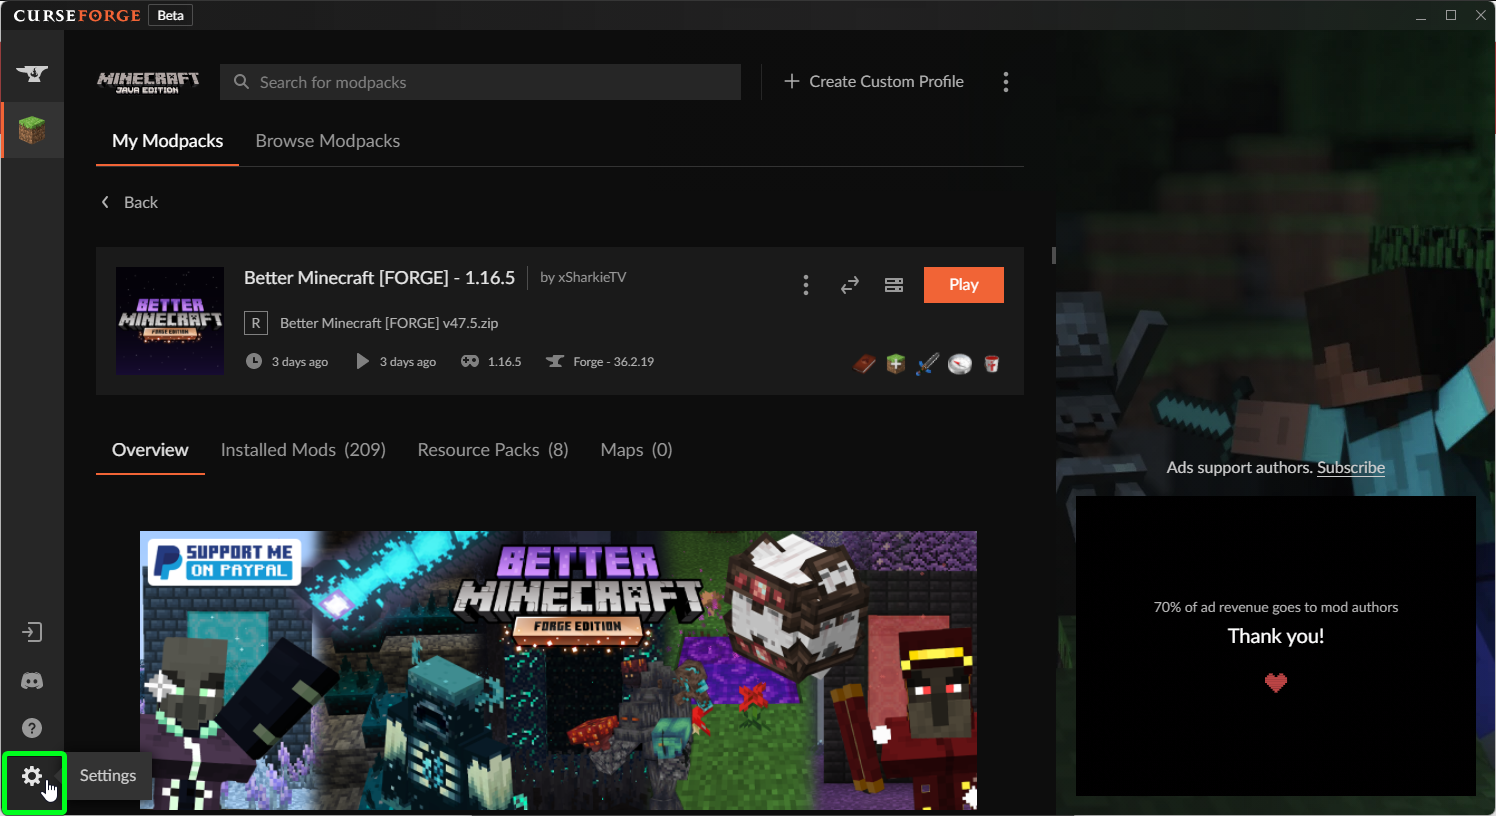
Once back in the CurseForge app click on the settings cog in the bottom right
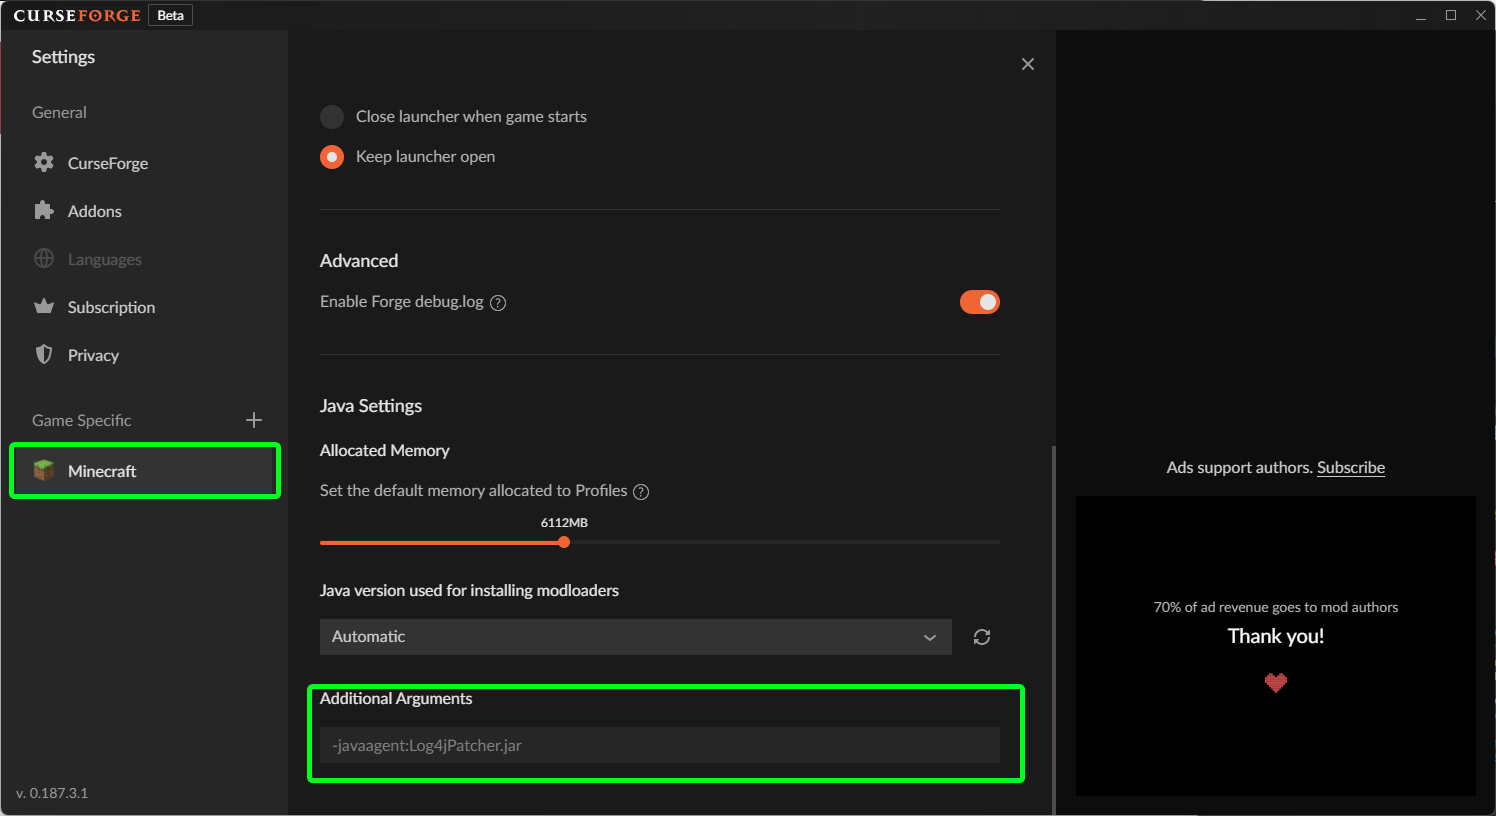
Now click on Minecraft and scroll down until you see an option named Additional Arguments.
In the textbox below add the following argument -javaagent:Log4jPatcher.jar
When you now click on play it will load the patch for you.
If you do not have the Log4jPatcher.jar in the instance or did not place it in the correct place, Minecraft will crash after clicking play.
How to install the patch when using the Vanilla launcher
First go to https://github.com/CreeperHost/Log4jPatcher/releases/latest and download the Log4jPatcher.jar.
If its named a little differently we recommend renaming to Log4jPatcher.jar to make it easier to follow the rest of the guide
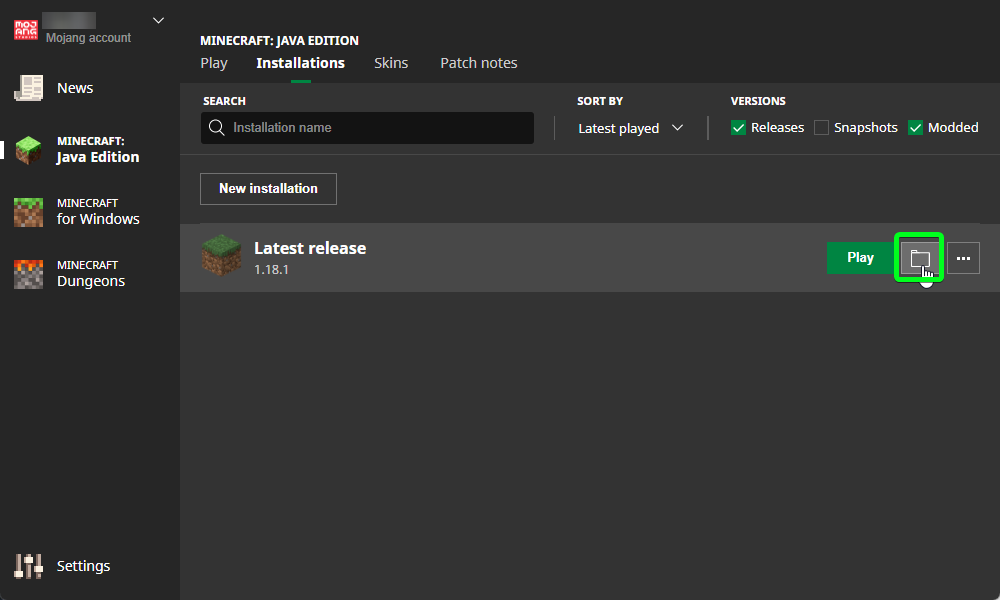
Now open up the Vanilla launcher and click on Installations
You should now see a list of all the installed versions, move your mouse over the install you wish to add the patch to and click on the folder icon
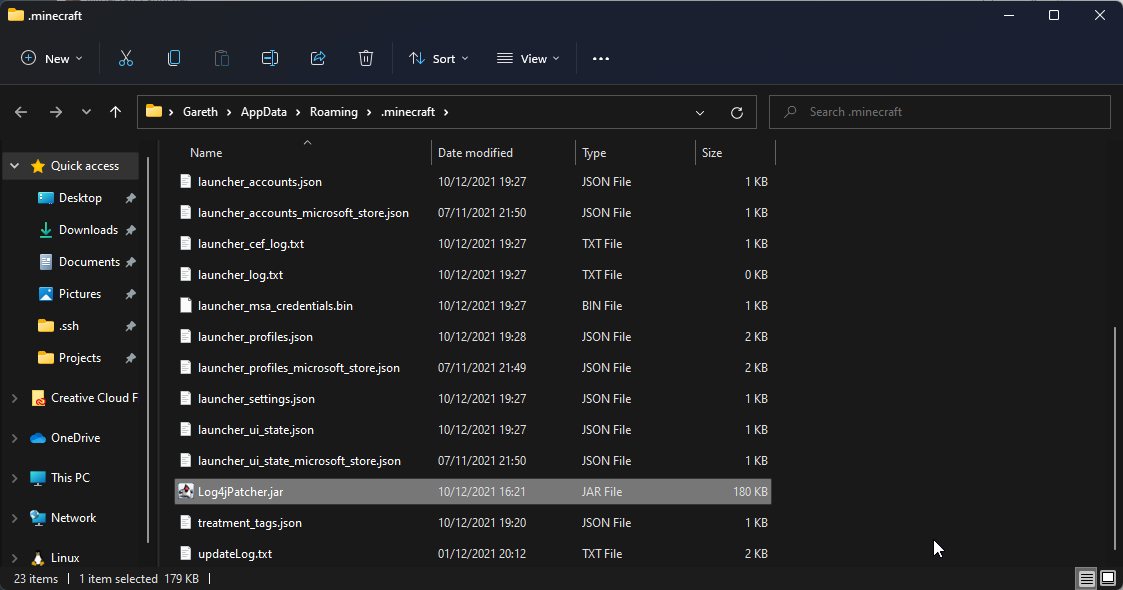
This will now open a new Explorer/Finder window where you want to move/copy the Log4jPatcher.jar that we downloaded earlier to.
Once its in the folder it should look something like the image below
You can now close the Explorer/Finder window and go back to the Vanilla launcher.
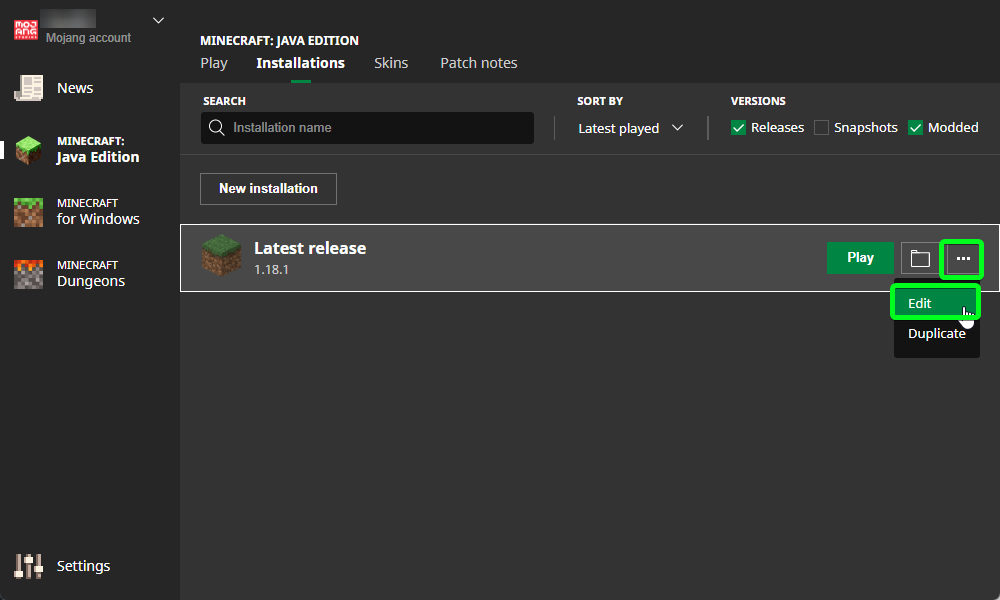
Once on the Vanilla launcher, again hover over the install you want to add the patch to but this time click on the button that has 3 small dots then click edit.
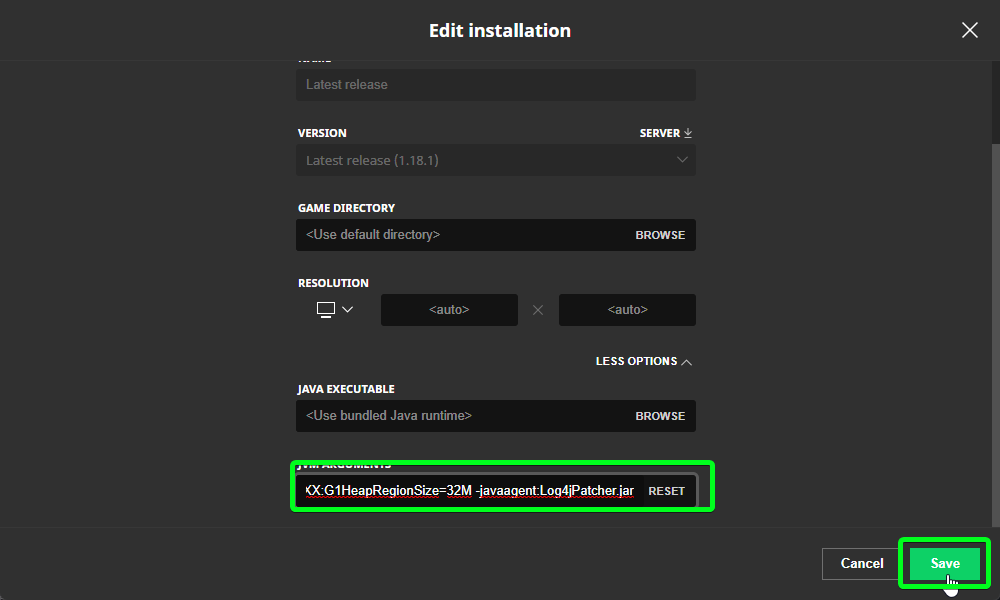
You should now have a screen with some settings listed, if you click on More Options it will show some more settings, the one we are interested in is the JVM arguments.
Click in the textbox and move the cursor to the end of the box by either pressing the right arrow key until its at the end or press the END key on your keyboard.
Once at the end press the space key and add the following line -javaagent:Log4jPatcher.jar and click Save
If all goes well Minecraft will start up, if any errors were made the game should not start up and show an error, if this happens go through the steps again to make sure everything is correct.
How to install the patch on a server
First go to https://github.com/CreeperHost/Log4jPatcher/releases/latest and download the Log4jPatcher.jar.
Now go to where your Minecraft server is installed and copy/move the Log4jPatcher.jar to that folder (Do NOT put this in the mods folder)
You will now need to edit your startup script/arguments and add -javaagent:Log4jPatcher.jar before the minecraft_server.jar.
E.g java -javaagent:Log4jPatcher.jar -javaagent:Log4jPatcher.jar minecraft_server.jar --nogui

