| **OPTION:** | **DESCRIPTION:** | **DEFAULT:** |
| Display Name (\*) | This is the name displayed for this Minecraft instance. | Name you give your instance when you create it |
| MOTD | The message of the day of your server. | A Minecraft Server |
| Allow Bedrock | Allows Bedrock players to connect - must be using Vanilla 1.16.2 or newer | False |
| Discoverability (\*\*) | If available, would you like this server to appear on the public server listing, be invite only or entirely unlisted? [Part of the MineTogether mod.](https://www.curseforge.com/minecraft/mc-mods/creeperhost-minetogether) | Unlisted |
| Server Port | The port of your server. Best to leave as default! | 25565 |
| Info Port | The port configured in ServerInfoProvider (If installed). | 25566 |
| Jar file to start (\*) | The jar file started by the control panel. | Auto-Detect |
| Memory (\*) | Memory to allocate to the server - usually fine on adaptive if only running one instance. | Adaptive |
| Arguments (\*) | Would you prefer the java arguments to try and optimize CPU usage, or, optimize RAM usage? | Low memory usage |
| PermGen/Metaspace (\*) | Permgen/Metapsace to assign. Should be Dynamic unless you are using Java 7 (default is Java 8). | Dynamic |
| Maximum Players | The maximum number of players that can be connected to the server. | 20 |
| Whitelist | Whether whitelist is enabled on the server. | false |
| Online Mode | Whether your server allows people without paid accounts. Please note - This will need to be set to 'false' to allow BungeeCord to work, as BungeeCord handles authentication. | True |
| Allow Flight | Allow flight for hacked clients. Usually should be disabled. Note: Mod packs may have additional flight settings in mod configs for certain flight-related items. | False |
| Enable PVP | Whether Player Vs Player is enabled. | True |
| Enable Command Block | Whether command blocks are enabled. | False |
| Announce Player Achievements | Announce in chat when a player gets a achievement in game. | True |
| Op Permission Level | The permissions that ops have by default. 1: Ops can bypass spawn protection 2: ops can use /clear, difficulty, /effect, /gamemode, /gamerule, /give and /tp - and can edit command blocks. 3: Ops can use /ban, /deop, /kick, and /op 4: Ops can use /stop. | 4 |
| Player Idle Timeout | If non-zero, players are kicked from the server if they are idle for more than that many minutes. | 0 |
| Enable Query | Whether your server has the query port enabled. Used by many server listing sites. | False |
| Query Port | Port used for server queries. | 25565 |
| Enable Rcon | Whether your server has the rcon port enabled. Used to control your server remotely. | False |
| Rcon Port | Port used for remote server control. | 25575 |
| Snooper Enabled | Sets whether the server sends snoop data regularly to Mojang. | True |
| Difficulty | The difficulty level: Easy, Normal, Hard. | Easy |
| Default Gamemode | Default set gamemode for new joining players. | Survival |
| Force Gamemode | Whether to force the default gamemode when a new player joins | False |
| View Distance | The view distance. Recommended 1~10. Note: View distance of 7 or lower can reduce mob/animal spawns dramatically. Increasing the view distance beyond 10 is not recommended. | 10 |
| Level Name | Which world folder to load. | World |
| Level Seed | The seed used to generate the world. | |
| Level Type | The level type used to generate your world, eg: Amplified, Default, Voidworld, Biomes'O'Plenty etc. | Default |
| Generate Structures | Whether world structures (such as villages) will be generated. | True |
| Hardcord Mode | Enable hardcore mode. Please note that this is set on generation of a new world, and can not be unset! | False |
| Generator Settings | Options to pass to the world generation. Useful with super-flat worlds. Usually blank. | |
| Max World Height | Maximum build height. | 256 |
| Max World Size | Maximum possible world size in blocks, expressed as a radius. | 29999984 |
| Allow Nether | Whether the Nether can be generated and travelled to. | True |
| Spawn Monsters | Allow mob spawns: true - yes, false - no. | True |
| Spawn NPC/Villagers | Allow villagers to spawn: true - yes, false - no. | True |
| Spawn Animals | Allows animals to spawn: true - yes, false - no. | True |
| Spawn Protection | Spawn protection radius. 0 is disabled! | 16 |
NOTE: You will not be able to use the Plugins/Mods menu's if the installation does not contain the appropriate folders. These folders are generated during startup with the applicable software: **Vanilla Minecraft** **can** **not load mods or plugins**. **Bukkit-based** Minecraft **can load plugins** (Not mods). **Forge-based** Minecraft **can load mods** (Not plugins). **Hybrid software can load mods and plugins**, however, depending on which software you opt for is unsupported, depreciated and unstable. We recommend 1.10.x+ mod servers can use [SpongeForge](http://www.spongepowered.org) to load plugins.
- View installed plugins/mods All detected plugins/mods will be listed on the Plugins/Mods Manager. You can click the buttons on the right side of the plugin or mod to disable or enable them. Disabled plugins/mods are renamed to prevent them loading with the .disabled filetype. - Upload plugins/mods from your PC Drag a plugin/mod jar file into the \[Upload\] box at the top of the Plugins/Mods Manager. Note: If the plugin/mod is too big, it may not upload via the browser, you would need to upload it via [sFTP/SSH](https://www.creeperhost.net/wiki/books/general-information/chapter/file-management "File management") to the corresponding plugins or mods folder for [your instances directory](https://www.creeperhost.net/wiki/books/minecraft-java-edition/page/installation-location "Installation Location"). - Install plugins from [Bukkit](https://dev.bukkit.org/bukkit-plugins) or mods from [Curse](https://minecraft.curseforge.com/mc-mods): Type the plugin/mod name into the search bar at the top of the Plugins/Mods menu, then click search. This may take a few seconds/minutes depending on the speed of the search. Once your plugin or mod has been found it will appear with a drop-down box next to it and an install button. The drop-down box dictates which 'build' you want installing, you can select older builds via this box, the newer build should always be displayed first. NOTE: Make sure to type the correct plugin/mod name, especially for modded searches, as "Exnihilo" is not the same as "Ex Nihilo", if the Bukkit/Curse website cannot display the correct results on their website, our panel will likely not be able to display an install for it either. # Changing Java VersionTo find your instance please follow this guide: [https://www.creeperhost.net/wiki/books/minecraft-java-edition/page/finding-your-instances](https://www.creeperhost.net/wiki/books/minecraft-java-edition/page/finding-your-instances)
First, you will need to make sure that the instance you are changing the version on has been stopped (you can find out how to stop your server [https://www.creeperhost.net/wiki/books/minecraft-java-edition/page/startingrestartingstopping-your-server](https://www.creeperhost.net/wiki/books/minecraft-java-edition/page/startingrestartingstopping-your-server))
If you need to change the Java version that is used to run your server you can follow the step by step guide below. #### Step 1 Click on Settings as highligted in the image below [](https://www.creeperhost.net/wiki/uploads/images/gallery/2020-12/lECLtqLxdfhkG3PE-msedge_2020-12-08_20-41-43.png) #### Step 2 On the settings page click on the Advanced tab #### [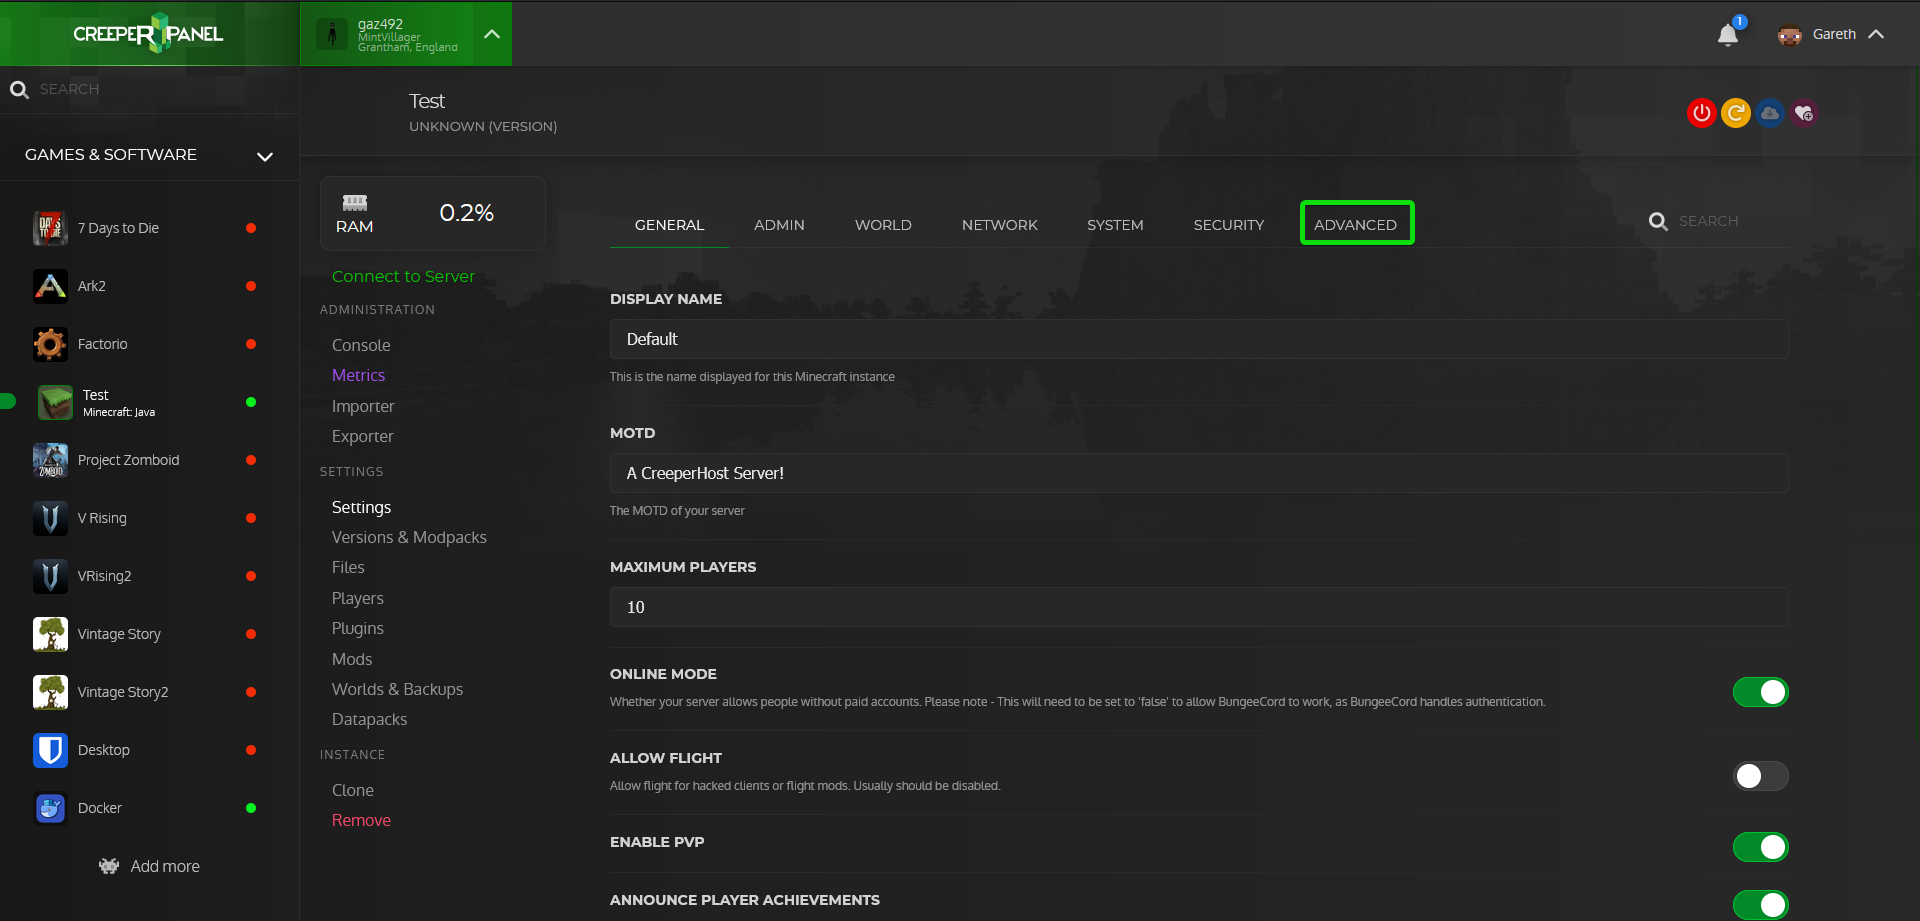](https://www.creeperhost.net/wiki/uploads/images/gallery/2023-09/CsZdlbdz62IMXBSU-firefox-2023-09-26-01-06-17.png) You will now be shown a warning message where you will need to click Show Advanced to continue [](https://www.creeperhost.net/wiki/uploads/images/gallery/2023-09/LSN8ANrhaZ2n72JM-firefox-2023-09-26-01-06-35.png) #### Step 3 Click on the JAVA dropdown box then select the Java version you need and click save [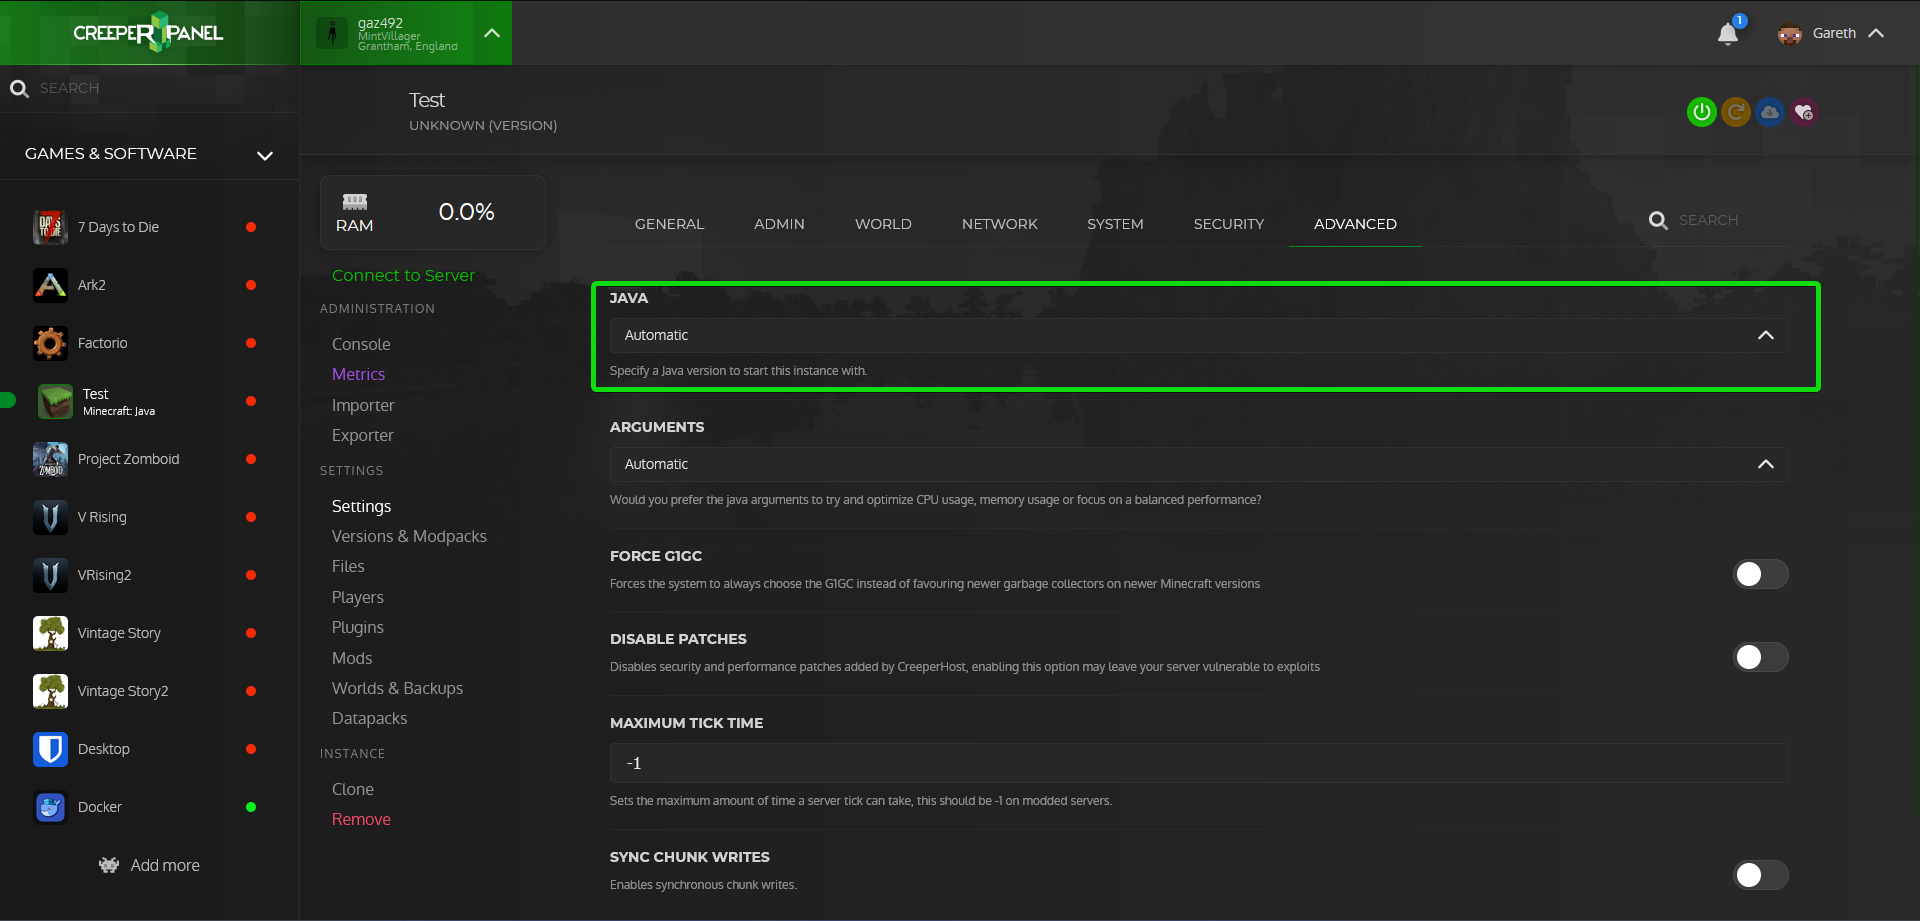](https://www.creeperhost.net/wiki/uploads/images/gallery/2023-09/mj21TxycQWHMGCFZ-2023-09-26-01-07-14.png) #### Step 4 You can now start your server back up and it will now be using the Java version you selected in the previous step.